I started this blog to share my recipes and techniques on how I like to cook or prepare food. I enjoy cooking and I love to make sure everyone is fed and fed well. lol I hope to be able to help with questions about different types of food and how to cook or prepare it. I also hope to share my love of food with you and for you to share yours with me.

If you would like, you can leave a comment or question for me here and I will try to answer you with-in 24 hrs.

Thank you for stopping by my blog.

Monday, March 28, 2011

Learning a whole new way of eating and life!

Well, I haven't been on here in over a month now. And in that month a lot has been going on in my home. We have remodeled the kitchen, from tearing up the entire floor to rebuilding walls! And we have also made a lifestyle change in our eating. I wont say that we will be completely vegan, raw or even vegetarian but we ARE trying to find our happy place amongst those options.

So I hope you will continue to follow me as we embark on this journey. As I change and transform, I will be posting new recipes as I come across them and learn how to make them. This new form of "cooking" is going to be fun and an awesome new challenge!

Here is the first all RAW vegan recipe I have made. It is a staple around here, so I thought it imperative that it be one of the first things I learn to make. ;D And if I do say so myself, it is DELISH!

RAW Ranch Dressing/Dip


Ingredients:
2 cups nuts raw cashews; soak (1-2 hrs is fine, then drain)
3/4 - 1 cup filtered water for blending
3 tablespoons lemon juice (translates into approx 1/2 lemon)
1/3 cup apple cider vinegar
1/3 cup extra virgin olive oil
3 tablespoons agave (or 3 dates)
2 cloves garlic (or as much as you are brave to add ;)
1 teaspoon garlic powder
3 teaspoons onion powder
1 teaspoon dill
1 teaspoon red pepper flakes
1 tablespoon Himalayan Red Sea salt
1/2 teaspoon basil

And to add after it's done:
1/4 cup finely minced parsley
1/2 t dill, minced

Directions:
In a Vitamix/standard blender, blend all ingredients till creamy and smooth except the last 2, then once blended, stir in the last 2 ingredients. It should have the consistency of a pourable dressing. Refrigerate after making. It should be good for up to 2 weeks.
If you are wanting to use it as a dip, then you will want it to be thicker, so you will use less water. But I have also discovered that is thickens after sitting in the fridge for a few days.

ENJOY!

Monday, February 14, 2011

Happy Valentines Day! Death by Chocoalte! LOL

I have been raking my brain for the past month trying to figure out what to make for my little man and hubby for this most loving day. They are both chocoholics, me not so much. Don't get me wrong, I love my chocolate just as much as the next girl but my guys LOVE chocolate! LOL

A few yrs ago I made a Hot Fudge Pudding Cake that we all loved. And now of course I couldn't find the recipe! So I've been searching for it this past week and finally found it in the final hour. :-D

Hot Fudge Pudding Cake


Ingredients:

1-¼ cups granulated sugar, divided
1 cup all-purpose flour
½ cup HERSHEY'S Cocoa, divided
2 teaspoons baking powder
¼ teaspoon salt
½ cup milk
1/3 cup butter or margarine, melted
1-½ teaspoons vanilla extract
½ cup packed light brown sugar
1-¼ cups hot coffee
Whipped topping or Vanilla Ice Cream

Directions:

1. Heat the oven to 350*. Combine ¾ cup sugar, flour, ¼ cup cocoa, baking powder and salt. Stir in milk, butter and vanilla; beat until smooth.

2. Pour batter into an un-greased 9-inch square baking pan. Stir together remaining ½ cup granulated sugar, brown sugar and remaining 1/4 cup cocoa; sprinkle mixture evenly over batter. Pour hot coffee over top; do not stir.

3. Bake 35 to 40 minutes or until center is almost set. Remove from oven; let stand 15 minutes. You do NOT want it to be completely set, it is soft served from the bottom. Serve in dessert dishes, spooning sauce from the bottom of the pan over the top. Garnish with whipped topping or vanilla ice cream. Makes about 8 servings.

Saturday, February 12, 2011

So let's get started!

So let's get started. I love food and everything about it. The textures, the smells, the different tastes. I like to try different things to see if I would want to share them or to try them again myself even. I have been enjoying Sushi a lot lately or at least what everyone else calls Sushi. I discovered I have a knack for making the nori rolls with out a mat. I am pretty pleased with that, I didn't think I would be able to do it. Next on my list is Spring Rolls to try and make. I wanted to find out what exactly sushi was though, here is what I found out:

Sushi is a Japanese dish consisting of cooked vinegared rice which is commonly topped with other ingredients, such as fish or other seafood, or put into rolls. Sliced raw fish by itself is called sashimi, as distinct from sushi. Sushi that is served rolled inside or around nori, dried and pressed sheets of seaweed, is makizushi. Toppings stuffed into a small pouch of fried tofu is inarizushi. A bowl of sushi rice with toppings scattered over it is called chirashizushi.


So I will start with the sharing how I make Sushi. Here goes.....

Sushi Rice


Ingredients:

3 cups short-grain white rice (sushi rice)
1/3 cup seasoned rice vinegar
3 ¼ cups water
3 tablespoons sugar
1 teaspoon salt

Directions:

1. Prepare sushi vinegar by mixing vinegar, sugar, and salt in a sauce pan. Put the pan on low heat and heat until the sugar dissolves. Cool the vinegar mixture.
2. In a fine strainer, rinse rice under cold running water until water runs clear. Drain for 5 to 10 minutes. Put rice in a 4- to 5-quart pan and add 3 1/4 cups water. Bring to a boil over high heat, then lower heat to maintain a simmer, cover, and cook until water is absorbed, 10 to 15 minutes.
3. Spread rice out in a shallow 12- by 16-inch baking pan. Please use a non-metallic bowl to prevent any interaction with rice vinegar and slowly pour vinegar mixture over it, turning rice gently and fanning it (the Japanese use a traditional fan, but you can use a piece of paper) until it comes to warm room temperature, about 15 minutes.

Next, a sushi recipe that is as simple as they come.


Ingredients:

8 ounces raw fresh tuna fillet
2 cups cooked sushi rice
1 to 2 tablespoons wasabi paste, to taste
soy sauce, to taste


Directions:

1. Slice the tuna into one-inch by two-inch rectangles, about a quarter-inch thick.
2. Take a small amount of the sushi rice and cradle it in your right hand at the base of your finger. Using your
hands, take the rice and form a rectangular shape to match the tuna slices.
3. Spread ¼ to ½ teaspoon of wasabi paste onto the slice of tuna. Place the rice block on top, and press
gently to shape the sushi. Repeat with remaining ingredients to make several sushi pieces.
4. Serve as desired.


Smoked Salmon Sushi Rolls


Ingredients:

Sushi Rice
Smoked Salmon
Cucumber, sliced into thin, long slices
Nori sheets

Directions:


1. Spread the rice onto the nori sheet, from edge to edge but in a thin layer. Next lay the salmon in a row onto the rice. Place one piece of cucumber along side of the salmon.


2. Lift the edge of nori closest to you; fold over filling. Roll toward top edge, pressing firmly on sushi roll a little at a time as you are rolling. Continue rolling to top edge. Let rest, seam side down, for 5 minutes. Slice crosswise into 8 pieces. Repeat procedure with remaining nori, rice mixture, salmon and cucumber.


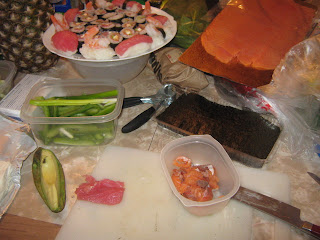
You can continue making rolls using different ingredients. I made some with tuna, smoked salmon and shrimp. The extras that I added were cream cheese, green onions, avocado, green bell peppers and cucumbers. My favorite were the tuna with green onion and the salmon with cream cheese. The easiest of course were the ones that are made up of just the rice and meat. I like to dip them into soy sauce and to spread a very thin spot of wasabi on to each bit. Very filling and oh so yummy!


Hibernating for the Winter!

Well, it has been too long. I promised myself that I wouldn't procrastinate anymore. I have been taking notes and pictures of almost everything I have been cooking now for the past few months. I have to get busy now and post them for you. So, here goes......


This is what is planned for Valentines Day dinner, with Oven Roasted New Potatoes and Asparagus. The recipes for them will come later.

Greek Style Rib Eye Steaks


INGREDIENTS:

  • 1 tablespoon garlic powder
  • 1 tablespoon dried oregano
  • 1 tablespoon dried basil
  • 1 teaspoon salt
  • ¼ teaspoon pepper
  • 4 beef rib-eye steaks (1 ½ inches thick)
  • 2 tablespoons olive oil
  • 2 tablespoons lemon juice
  • ¼ cup crumbled feta or blue cheese
  • 2 tablespoons sliced ripe olives

DIRECTIONS:

  1. Turn oven onto Broil. In a small bowl, combine the first five ingredients; rub onto both sides of steaks. Place steaks onto a broiler pan that has been oiled with olive oil to prevent them sticking. Depending on how you like your steaks you will turn them in about 4-6 minutes for medium rare or until meat reaches desired doneness (for medium-rare a meat thermometer should read 145 degrees F, medium, 160 degrees F, well-done, 170 degrees F). Sprinkle with lemon juice, cheese and olives. Serve immediately.

Wednesday, October 13, 2010

The Weekend Was Way Too Long!

Sorry for being gone so long. It was a full weekend with college homecomings and marching band performances in St Joe, MO. And then I needed to make another trip up to St Joe on Monday to help my son pick out another laptop for college. Tuesday was spent getting caught up around the house and so now I can concentrate on the fun stuff, cooking and finding new recipes to share!

One of my favorites types of food is Greek or Mediterranean/Middle Eastern. Here are a few recipes I use. They are family friendly recipes because I have a picky 10 yr old who can be hard to make happy with something other then chicken strips or hamburgers. 

Here is a dressing/sauce that is awesome with Greek Style Steak Salad (with Tzatziki dressing). First you will marinate, cook and slice the steaks and then add to the salad. I also like to make regular Gyros from these ingredients as well.


Greek Style Steak Salad 

(with Tzatziki Dressing)

INGREDIENTS:

  • 1 tablespoon garlic powder
  • 1 tablespoon dried oregano
  • 1 tablespoon dried basil
  • 1 teaspoon salt
  • ¼ teaspoon pepper
  • 2 tablespoons olive oil
  • 4 beef rib-eye steaks
  • 1 medium seedless cucumber cubed for salad
  • 2 heads romaine lettuce, chopped
  • ½ cup red peppers, chopped
  • ½ cup Kalamata olives, pitted or with seeds
  • ½ red onion, thinly sliced
  • 2 tomatoes, seeded and diced
  • ½ cup crumbled feta or blue cheese
  •  Pita bread or pockets, quartered

DIRECTIONS:

  1. In a small bowl, combine the first six ingredients; rub onto both sides of steaks. Let them marinate for about 15-20 minutes. 
  2. Turn oven to Broil. Broil for about 3-4 minutes on each side depending on thickness and how you prefer your steak (for medium-rare a meat thermometer should read 145 degrees F, medium, 160 degrees F, well-done, 170 degrees F). Let stand for 5 minutes then slice thinly against the grain.
  3. In a large salad bowl toss lettuce, chopped cucumber, red peppers, olives, onion, tomatoes and feta.
  4. Brush pita triangles with olive oil then place on a grill or hot skillet, watching closely, until golden brown.
  5. Divide salad evenly among plates, top with steak and pitas.    


Tzatziki Dressing
(Greek Yogurt Cucumber Sauce)

 Ingredients:
  • 2 (8 ounce) containers Greek Yogurt
  • juice of one lemon (about 1½ T)
  • 2 garlic cloves, chopped
  • 2 medium cucumbers, seeded and grated 
  • ½ T kosher salt for salting cucumbers
  • 1 T finely chopped fresh dill  or ½ T dried dill (you can substitute mint leaves for a slightly different version)
  • Kosher salt and fresh ground black pepper to taste

Directions:
1. If you don't have Greek yogurt, strain plain yogurt with a cheese cloth.
2. Peel cucumbers, then cut in half lengthwise and take a small spoon and scrape out seeds. Discard seeds. (If you use the small seedless or European cucumbers with few seeds, you can skip this step.)
Slice cucumbers, then put in a colander, sprinkle on 1 T salt, and let stand for 30 minutes to draw out water. 3. Drain well and wipe dry with paper towel.
4. Grate cucumber with a cheese grater. As fine as you can get it. Drain again if needed. Put cucumber, garlic, lemon juice, dill, and a few grinds of black pepper in a bowl. Mix together, then stir this mixture into the yogurt.
5. Taste before adding any extra salt, then salt if needed.
6. Place in refrigerator for at least two hours before serving so flavors can blend. (This resting time is very important.)
7. Drizzel the dressing over the salad. Enjoy!

(This dressing will keep for a few days or more in the refrigerator, but you will need to drain off any water and stir each time you use it.)


*Disclaimer, not all photos are mine and the original photographer is unknown to me.

Friday, October 8, 2010

Olive Garden Dish Verses the Home Version of Chicken Gnocchi

I first discovered Chicken Gnocchi about a year ago at Olive Garden. I loved it so much I went home that evening and searched for a recipe. It took about 2 tries and I got it! At least I think I did. lol Now it is a dinner everyone in the family asks for, even my picky 10 yr old. :P


Ingredients:

·    5 chicken thighs, boneless and skinless
·    ½ tablespoon Montreal Chicken Seasoning
·    Salt & Pepper to taste
·    ½ cup butter (1 stick)
·    1 tablespoon olive oil
·    3 cups chicken stock
·    1 ½ cups heavy whipping cream
·    2 stalks celery, grated
·    3 roasted garlic cloves, smashed
·    1 carrot, grated
·    1 medium onion, diced
·    2 cups fresh spinach, 6 oz. bag
·    12 ounces mini potato gnocchi
·    ¾ tablespoon flour (optional)

Directions:

1.    Season, chop and sauté the chicken in butter and a little olive oil until opaque. Deglaze the pan with a little of the chicken stock and reserve it for the stockpot.

2.    Sauté the celery, onion, garlic, and carrot in butter over medium heat until onions are translucent. Season as desired with salt and pepper.

3.    Add chicken to onion mixture in a large stockpot. Then add the reserved chicken stock, the remaining chicken stock, and the cream. Heat to boiling, and then add gnocchi. Gently boil for 4 minutes, and then turn down to a simmer for 10 minutes.

4.    Add spinach and cook for another 1-2 minutes, or until spinach is wilted.

5.    Heat to boiling and add flour that has been dissolved in 1-2 Tbsp chicken stock at this point, if you want a thicker soup.

6.    Ladle into bowls and serve with some crunchy croutons! Enjoy!