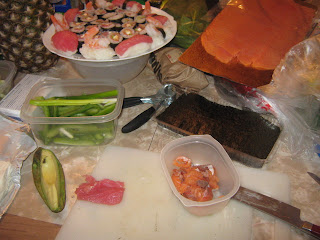
So let's get started. I love food and everything about it. The textures, the smells, the different tastes. I like to try different things to see if I would want to share them or to try them again myself even. I have been enjoying Sushi a lot lately or at least what everyone else calls Sushi. I discovered I have a knack for making the nori rolls with out a mat. I am pretty pleased with that, I didn't think I would be able to do it. Next on my list is Spring Rolls to try and make. I wanted to find out what exactly sushi was though, here is what I found out:
Sushi
is a Japanese dish consisting of cooked vinegared rice which is commonly topped with other ingredients, such as fish or other seafood,
or put into rolls. Sliced raw fish by itself is called sashimi, as distinct from sushi. Sushi that is served rolled inside or around nori, dried and pressed sheets of seaweed, is makizushi. Toppings stuffed into a small pouch of fried tofu is inarizushi. A bowl of sushi rice with toppings scattered over it is called chirashizushi.
So I will start with the sharing how I make Sushi. Here goes.....
Sushi Rice
Ingredients:
3 cups short-grain white rice (sushi rice)
1/3 cup seasoned rice vinegar
3 ¼ cups water
3 tablespoons sugar
1 teaspoon salt
Directions:
1. Prepare sushi vinegar by mixing vinegar, sugar, and salt in a sauce pan. Put the pan on low heat and heat until the sugar dissolves. Cool the vinegar mixture.
2. In a fine strainer, rinse rice under cold running water until water runs clear. Drain for 5 to 10 minutes. Put rice in a 4- to 5-quart pan and add 3 1/4 cups water. Bring to a boil over high heat, then lower heat to maintain a simmer, cover, and cook until water is absorbed, 10 to 15 minutes.
3. Spread rice out in a shallow 12- by 16-inch baking pan. Please use a non-metallic bowl to prevent any interaction with rice vinegar and slowly pour vinegar mixture over it, turning rice gently and fanning it (the Japanese use a traditional fan, but you can use a piece of paper) until it comes to warm room temperature, about 15 minutes.
Next, a sushi recipe that is as simple as they come.
Ingredients:
8 ounces raw fresh tuna fillet
2 cups cooked sushi rice
1 to 2 tablespoons wasabi paste, to taste
soy sauce, to taste
Directions:
1. Slice the tuna into one-inch by two-inch rectangles, about a quarter-inch thick.
2. Take a small amount of the sushi rice and cradle it in your right hand at the base of your finger. Using your
hands, take the rice and form a rectangular shape to match the tuna slices.
3. Spread ¼ to ½ teaspoon of wasabi paste onto the slice of tuna. Place the rice block on top, and press
gently to shape the sushi. Repeat with remaining ingredients to make several sushi pieces.
4. Serve as desired.
Smoked Salmon Sushi Rolls
Ingredients:
Sushi Rice
Smoked Salmon
Cucumber, sliced into thin, long slices
Nori sheets
Directions:
1. Spread the rice onto the nori sheet, from edge to edge but in a thin layer. Next lay the salmon in a row onto the rice. Place one piece of cucumber along side of the salmon.
2. Lift the edge of nori closest to you; fold over filling. Roll toward top edge, pressing firmly on sushi roll a little at a time as you are rolling. Continue rolling to top edge. Let rest, seam side down, for 5 minutes. Slice crosswise into 8 pieces. Repeat procedure with remaining nori, rice mixture, salmon and cucumber.
You can continue making rolls using different ingredients. I made some with tuna, smoked salmon and shrimp. The extras that I added were cream cheese, green onions, avocado, green bell peppers and cucumbers. My favorite were the tuna with green onion and the salmon with cream cheese. The easiest of course were the ones that are made up of just the rice and meat. I like to dip them into soy sauce and to spread a very thin spot of wasabi on to each bit. Very filling and oh so yummy!


